Winter can be a harsh time for gardens and plants. Between the wind, fluctuating temperatures, snow, and ice, it can be difficult for some plants to thrive. Thankfully, there are things you can do to help protect your plants from the winter elements.
1Know Your Plants and Growing Zone
Understand what you’re growing and the environment you’re growing it in
One of the most important steps in learning how to protect plants in winter is knowing the individual growing needs and care requirements of the plants you’re growing.
- Some plants can tolerate cold temperatures and snow, others need a little help from you, while some plants won’t survive outdoors in the winter.
- Develop a good understanding of the growing zone you live in and the temperature and weather you can expect through the winter.
- Combine this environmental knowledge with your plant’s needs to come up with a care strategy that matches your plants with the environment they’re growing in.
2Mulch For Protection
The roots of your plant will thank you
Winter mulching is a low-labor investment that will reap large rewards. Mulching helps protect your winter plants outdoors, and it’s important to mulch for a variety of reasons.
- Insulates the roots of your plants from freezing temperatures.
- Retains moisture from your last watering.
- Protects your garden and plants from freezing and thawing, which can cause frost heave — when the frozen water in the soil lifts the roots of your plant from the ground.
- Keeps the temperature below ground stable, so your plant doesn’t leave its dormancy too early.
- Improves your soil when the nutrients in organic mulch breaks down over the winter and into the spring.
| Which Plants Need Mulch? | Trees and shrubs |
|---|---|
| Perennial flowers and plants | |
| Cold-hardy vegetables | |
| Potted plants | |
| Mulching Materials | Pine straw |
| Bark chips or chipped wood | |
| Pine needles | |
| Shredded leaves and grasses | |
| How Much Mulch? | Apply mulch in a 2 to 4-inch layer around the base of your plants. |
| Mulching Considerations | Leave a 2-inch space between the base or trunk of your plant and your mulch. This prevents water and disease from settling in the area and increases air circulation, so the plant doesn’t rot. |
If you’ve ever been told to mound your roses in the fall to protect them in winter, this is the same concept as adding mulch. Your goal is to protect delicate roots from winter temperatures, unexpected thaws, and frost heaving by building up a mound of dirt 10 to 12 inches thick.
3Stop Watering in The Fall
Discourage your dormant plants from continuing to grow
Once fall has arrived, it’s time to stop watering any plants you plan on overwintering.
| When to Stop Watering | Before the first frost date for your area. |
|---|---|
| Once air temperatures have dropped below 40 degrees Fahrenheit — the roots of your plants can’t absorb water past this point. | |
| Why You Stop Watering | Watering encourages your plants to grow. Since you want them to remain dormant throughout the winter, you should stop watering. |
| Water left in the soil around your plants’ roots is susceptible to freezing and thawing. Frozen soil water leads to frost heaving and your plants’ roots being pushed above the soil. Thawing can lead to root rot. | |
| When to Resume Watering | When daytime temperatures stay above 40 degrees Fahrenheit |
| In early to mid-spring — anywhere from April to May depending on your growing zone. |
4Hold Off On Fertilizing
Winter fertilizing encourages plants to grow out of season
Fertilizing is a lot like water — it encourages plants to grow. You don’t want your dormant plants producing new growth in the winter, so it’s best to stop early enough for your plants to harden off before the frost hits.
| When to Stop Fertilizing | Dependent on the plant |
|---|---|
| Most plants should have the entire fall to enter dormancy, so you shouldn’t fertilize past mid-summer. | |
| Why You Stop Fertilizing | Fertilizing encourages new growth — new growth is fragile and susceptible to damage in harsh winter conditions. |
| Fertilizing too late confuses the plant’s natural signals, and may prevent it from entering into its dormancy period. | |
| When to Resume Fertilizing | This is dependent on your plant’s individual needs. |
| Some plants benefit from fertilizer as soon as they exit dormancy in the spring, others can wait until summer. |
5Time Your Pruning Properly
Knowing when to prune prevents winter harm
| Prune in The Fall | Old wood hydrangeas |
|---|---|
| Hostas | |
| Daylilies | |
| Some perennials including: bearded iris, chrysanthemums, bee balm, coneflowers, and blue false indigo | |
| Summer blooming lavender | |
| Prune in Late Winter | Butterfly bush |
| Shrub roses | |
| Cape Myrtle | |
| Panicle Hydrangeas | |
| Prune in The Spring | Fruit Trees |
| Spring blooming lavender | |
| Coreopsis | |
| Asters | |
| Prune in The Summer | Forsythia |
| Witchhazel | |
| Honeysuckle | |
| Azaleas | |
| Bigleaf and oakleaf hydrangeas |
6Protect Plants in Winter by Wrapping Them
Some vulnerable plants benefit from being wrapped in winter
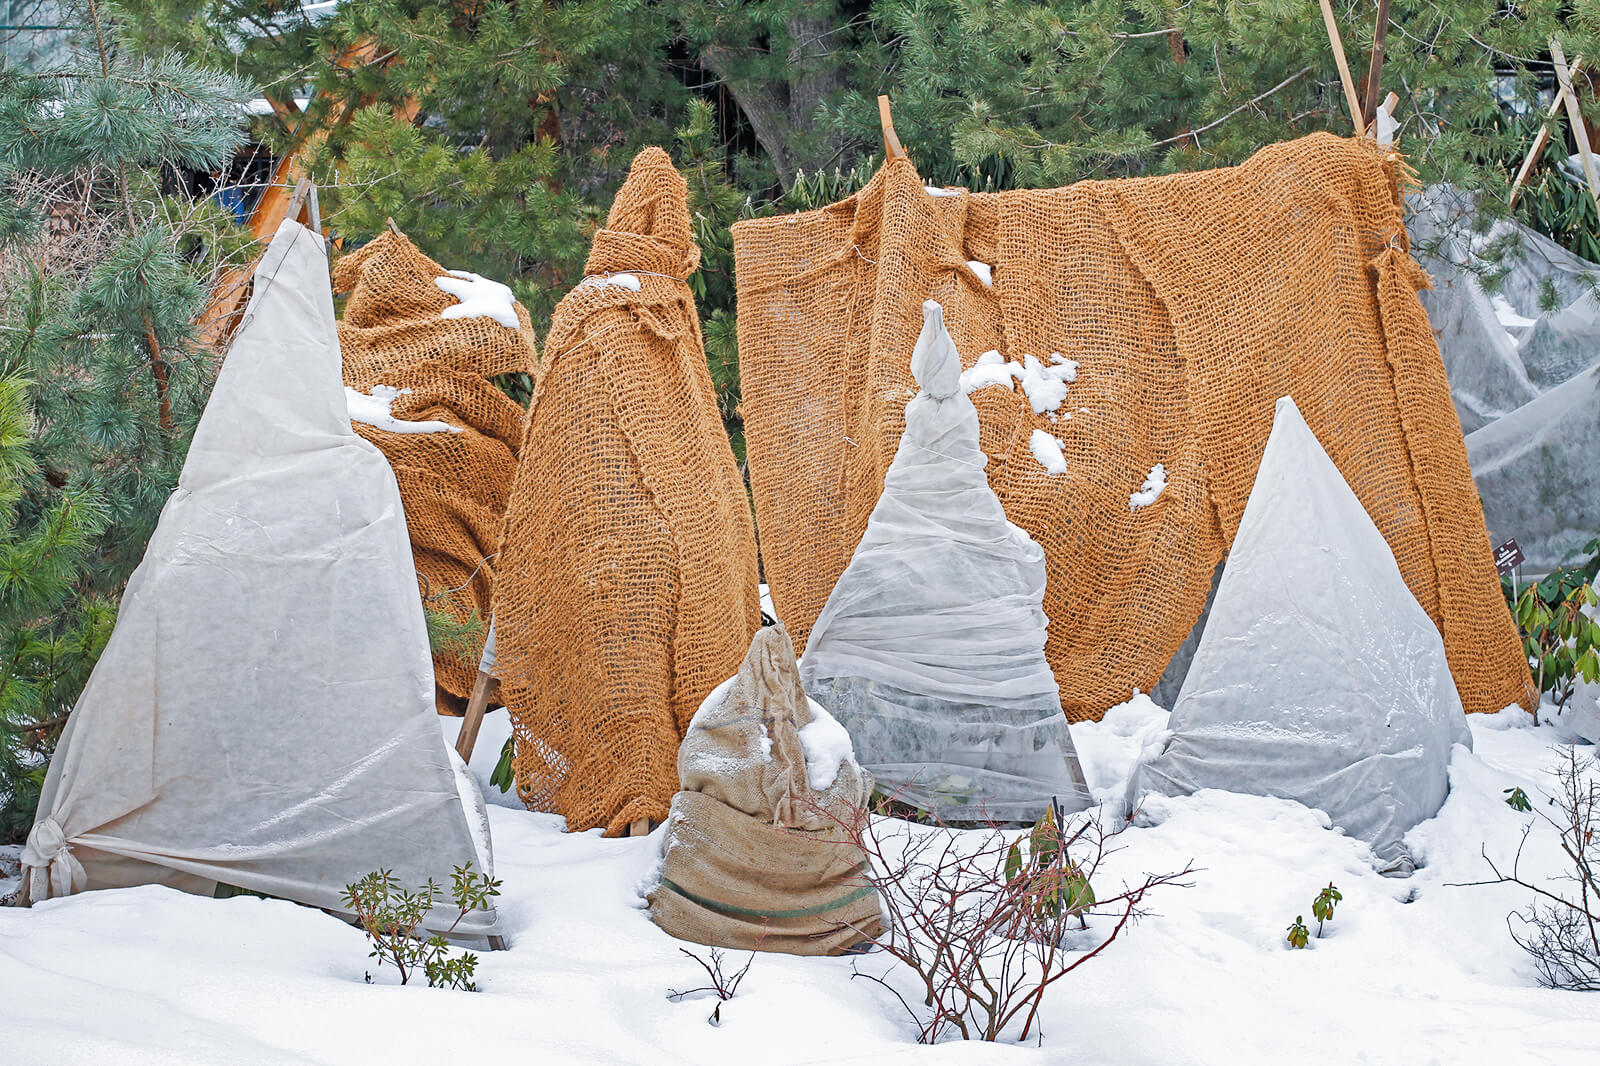
Not every plant needs to be wrapped — in fact, there are some that wouldn’t like this at all — but for those that need it, wrapping prevents a lot of potential winter damage. Learn how covering plants for winter can help protect them from the elements.
| Why Should You Wrap Plants in Winter? | Prevents damage caused by strong winds. |
|---|---|
| Shelters the plant from extreme freezing temperatures. | |
| It can stop heavy snow loads from splitting your plant. | |
| What Plants Might Need Winter Wrapping? | Shrubs and trees under two to three years old should be wrapped since they’re still young and fragile. |
| Tender plants | |
| Potted plants | |
| Broadleaf evergreen shrubs need winter wrapping frequently. | |
| What Materials Make the Best Plant Wrap? | Burlap bags and cloth are the best plant covers for winter — it allows airflow, prevents excess heat and moisture from building up, and it’s strong enough to survive the elements. |
| How to Wrap Plants | Barrier option: drive three or four stakes in the ground around the base of your plant. Warp burlap around these stakes forming a protective barrier. This protects against wind damage. |
| Tie and wrap option: Gather the branches of your plant inwards towards the center and tie them with twine. Wrap the entire plant in burlap. This prevents snow from getting in between the branches, driving them apart. | |
| Containers: Wrap burlap around the base of the container or pot. The goal here is to protect the roots from the cold, so you don’t need to wrap the upper portion of the plant. |
7Consider Moving Your Potted Plants
Move indoors, to a sheltered location, or elevate
| Moving Your Plants Inside | If you’re growing a perennial plant that needs heat and sunlight, moving the pot indoors is the best option. |
|---|---|
| Moving Your Plants to an Outdoor Shelter | Some hardy perennials and shrubs can’t tolerate extreme temperatures but they need to stay dormant over the winter. |
| Move these plants into an unheated garage, shed, or winter greenhouse to keep them out of the worst of the elements without breaking their natural winter dormancy. | |
| Moving Your Plants Away From Wind | If the wind in your location is heavy enough to damage the branches on your plants, consider moving them beside a building or fence to shelter them from the harshest winds. |
| Moving your plant beside your home will also provide a bit of ambient heat if you’re worried about low temperatures. | |
| Elevating Your Planters and Pots | The roots of potted plants are the biggest thing to worry about in winter. Elevate your plant on bricks or patio stones to keep it off the ground and allow excess water to drain away from the roots in case of a thaw. |
The best time to wrap your plants is in November. It’s okay if there’s been a frost, but you want to hit the window between when your plants go dormant, and when winter weather is expected to hit.
8Fill Cracks in the Soil
How to protect plants from frost damage to roots
In the fall, check the soil around the base of your in-ground plants. If you see the soil cracking, do your best to fix it, but fixing soil cracking isn’t as simple as adding more dirt to the cracks. The problem might take a few seasons to fix. In the meantime, a thick layer of mulch will help prevent frost from settling into the cracks.
| Why is My Soil Cracking? | Heavy clay soils have a tendency to crack. |
|---|---|
| If you’re experiencing a drought, the loss of moisture can cause the soil to contract, creating cracks. | |
| Why Fill Cracks in The Soil? | Cracks in the soil allow frost to creep into the ground around your plants’ roots. |
| This frost can kill the exposed roots of your plants. | |
| How to Fix Soil Cracks | If the soil is clay, adding organic matter makes the soil more porous. Adding compost, wood chips, grass clippings, worm castings, or cover crops can change the soil over time. |
| If the soil is dry, water it well to help it expand and fill in the cracks. |
The best way to deal with soil cracks is to prevent them from happening! Before you plant, make sure your soil has good drainage, so it doesn’t retain or lose too much water.
Winter doesn’t have to be a scary time for your plants. Using some clever care tips, you can protect your plants in the winter, so they’re strong and ready to grow the following spring!
Share this article with all your friends and family, so they can learn how to protect their plants in the winter too!


